

Add barn chic to your home
written by Melissa Dalton
Jeff Fountain incorporated two sliding barn doors in the Greenfields’ home to cover interior windows in two bedrooms. Sliding barn doors are a simple weekend project that can be customized to fit many different types of applications and home styles. We cover the basic guidelines.
1. Choose a door
A simple browse through Pinterest reveals the many ways people have adapted this project to their homes. Do you want a single or double door? Do you prefer a contemporary aesthetic, like a chevron pattern, or do you want patina via a salvaged door? Have fun gathering inspiration, whether it’s a traditional five-panel door for a streamlined look or an X-panel door similar to those found in the Greenfield home. Solid wood is preferable over hollow-core varieties, and make sure the door is wider than the opening it will cover, by at least 6 inches.
2. Choose your hardware
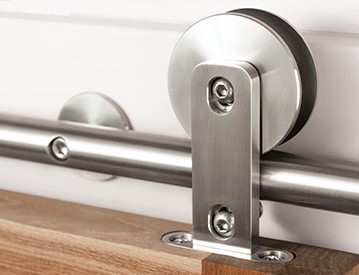
There is a wide-range of sliding door kits to choose from, and many companies now manufacture them. Opt for a color and style that will mesh with your home’s existing hardware. We like the designs offered from the Gig Harbor-based Real Sliding Hardware.
realslidinghardware.com
3. Install the hardware and rail
Always follow the instructions that come with your specific hardware kit. Basic steps will include first marking where the roller straps are to be installed on the door, being mindful of the clearance between the top of the door and the track. Pre-drill the holes for the bolts before fastening the straps. To ensure correct support for the entire system, fasten the rail brackets to the wall studs. If that’s not an option, make sure the wall is reinforced properly wherever the brackets will be attached. After hanging the door, install a floor guide to ensure it stays on course.