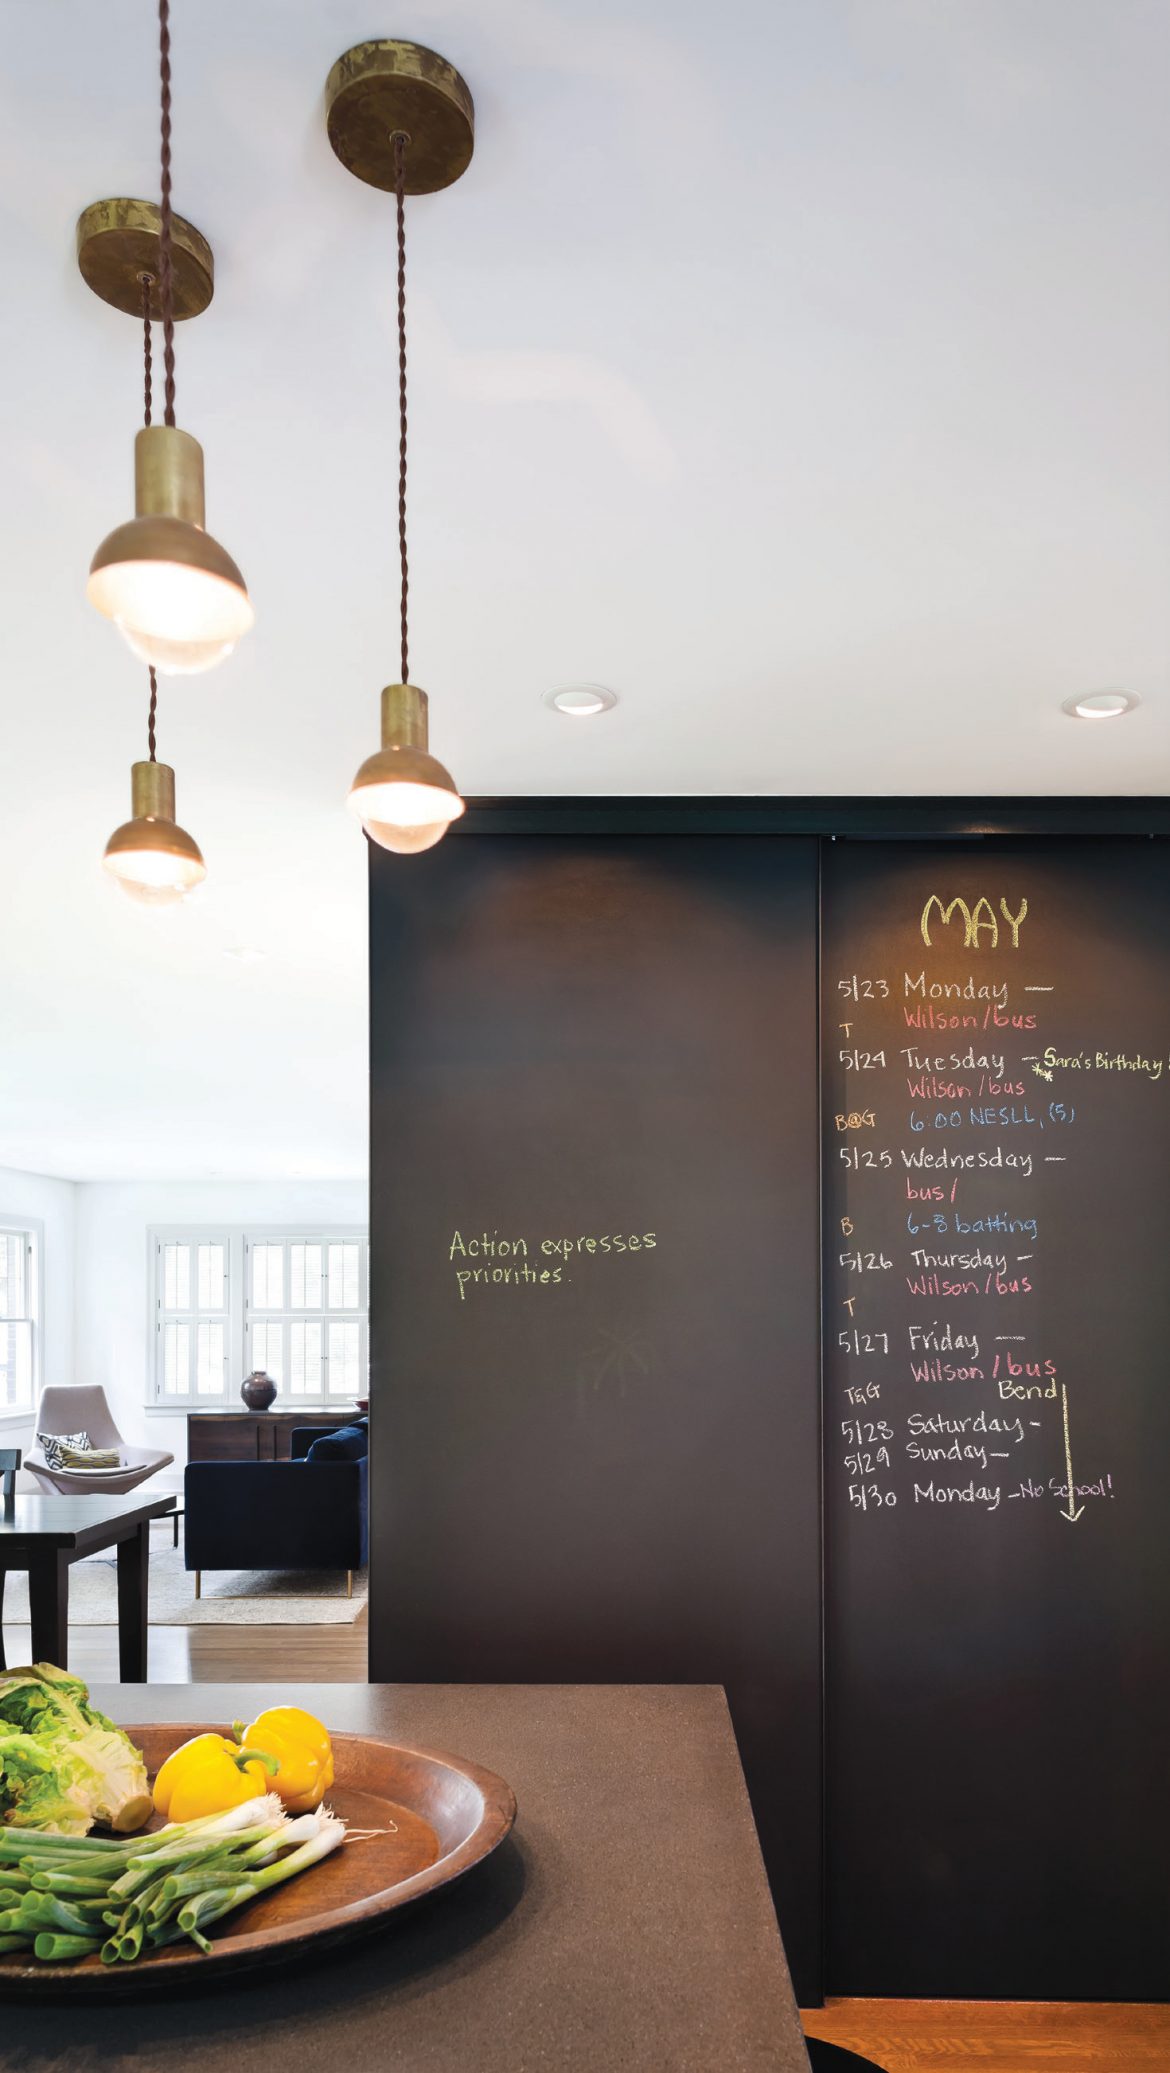
A chalkboard wall is an easy way to set up a centralized message board in the home. Use it for appointment reminders, family member schedules, the week’s menu. It can also be an unlimited artistic canvas, for inspiring quotes or drawings. Here are our tips for creating yours.
DESIGN
It’s easy to assume that a chalkboard wall would be restricted to the color black, but not so. Chalkboard paint comes in a rainbow of colors that can be coordinated with existing decor.
PREP
Choose a smooth, flat surface and clean it thoroughly. Tape out the perimeter of the chalkboard using painter’s tape and a level, which will ensure the edges are straight. Lay down a drop cloth to protect the floors.
PAINT
Stir the paint. Using a foam roller, paint the wall with even strokes. Follow brand instructions for dry time in between passes, but you will most likely need three coats to get complete coverage.
CURE AND CONDITION
When finished, leave the wall for several days so it can cure completely. Afterward, rub a piece of chalk over the entire surface and then wipe it off. This conditions the paint to make it smoother for future scribbles.
FINISH
If you are only painting a section of wall instead of the entire expanse, give the chalkboard a finished look by adding decorative molding around the perimeter, painted in a complimentary color. Cut trim pieces to size, making sure to miter the corners so they meet at a neat angle. Attach trim to the wall with nails.
START DRAWING
Need to clean? Use soap and water. Kids moving out? Paint over it as you would any other type of paint finish.